
Babicz LX2 TWIN LOCKING TAILPIECE
US Patent #9,449,587
SSP: $84.95-$104.95
Includes FREE SHIPPING for orders within
the continental United States.
$39.00 S&H will be billed separately on orders outside continental U.S.
We accept most major credit cards or PayPal...with secure online shopping!
the continental United States.
$39.00 S&H will be billed separately on orders outside continental U.S.
We accept most major credit cards or PayPal...with secure online shopping!

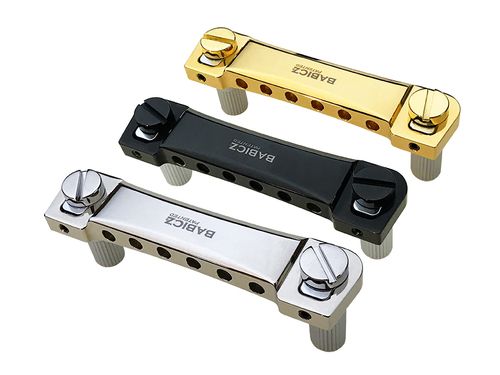
The patented LX2 tailpiece, designed by Jeff Babicz, offers unmatched string stability due to the “twin locking” feature. Unlike traditional tailpieces which are only held in place by string tension, the LX2 offers unidirectional locking; vertically and laterally. The combined twin locking forces offer the most stable tailpiece found today, and is a drop in fit upgrade for guitars which use Tune-O-Matic/Tailpiece combo. The lightweight LX2 tailpiece is designed with only the highest quality, sonically pure milled billet aluminum, and is available in chrome, black, and gold finishes. Ships world wide.
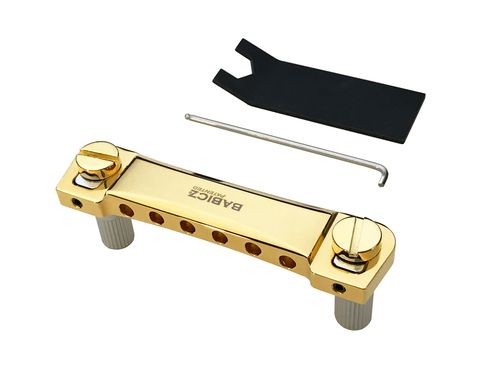
Gold Finish
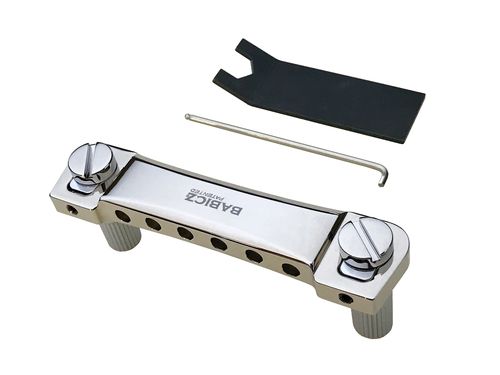
Chrome Finish
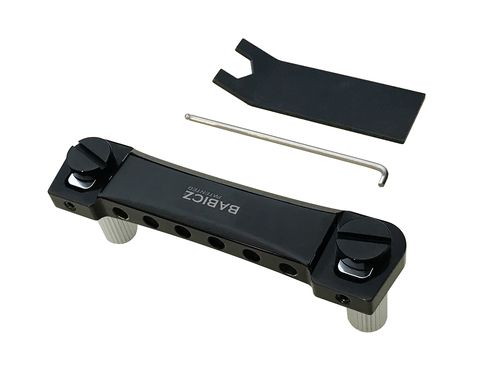
Black Finish
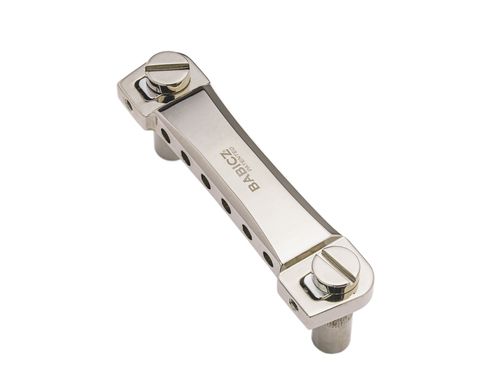
Nickel Finish
Looking for a matching Tune-O-Matic bridge to pair with your LX2 tailpiece?
Check out the Babicz Original Series Tune-O-Matic, or for new builds, try out the Babicz OEM Tune-O-Matic bridge.
Check out the Babicz Original Series Tune-O-Matic, or for new builds, try out the Babicz OEM Tune-O-Matic bridge.
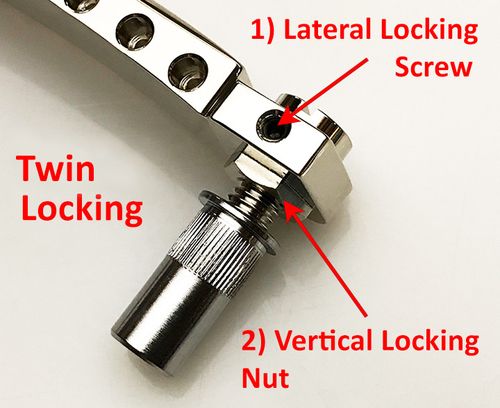
How it works
There are two main facets to the Babicz twin locking tailpiece invention:
1. Lateral Locking Screws: Once tightened, the two screws make firm contact with the lateral locking slugs, which firmly hold the tailpiece to the mounting studs in a lateral direction.
2. Vertical Locking Nuts: Two stud nuts that, when adjusted upward with the provided wrench, hold the tailpiece stable in the vertical direction.

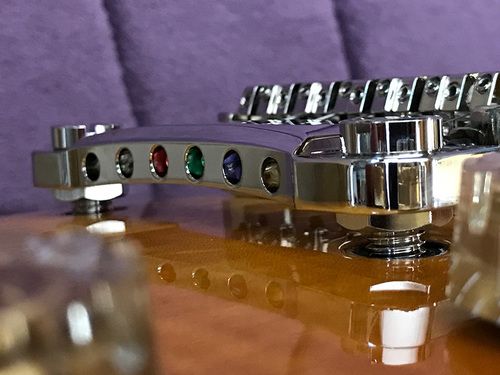
“This new design was born out of my vision of creating a tailpiece with more stability, along with ease of adjustment. Any stability added to the bridge/tailpiece components always help with sonic purity and tuning stability. The LX2 unidirectional locking forces create the most stable, rock solid tailpiece on the market today.”
- Jeff Babicz, Inventor
- Jeff Babicz, Inventor
-Click below for a detailed spec sheet view-
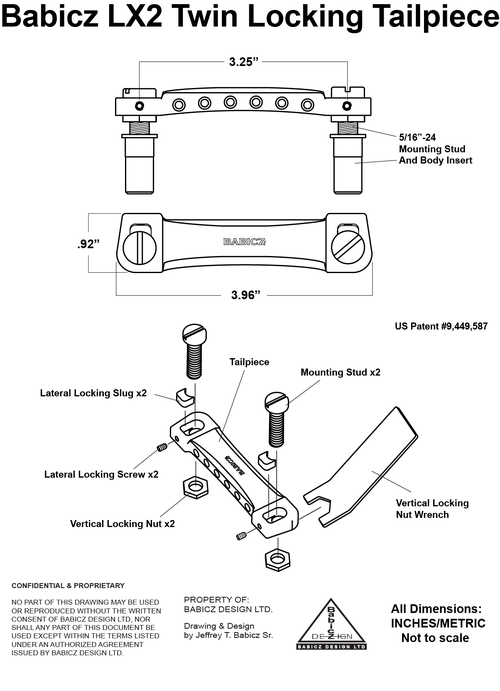
Features:
- Twin Locking -Laterally and Vertically for unmatched string stability
- Milled Billet Aluminum Construction. Lightweight with great sonic purity
- Drop in upgrade fit for guitars that use a Tune-O-Matic type bridge
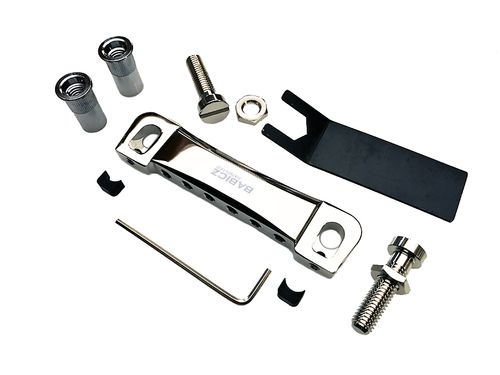
- Includes: LX2 Tailpiece, Mounting Studs, Body Inserts, 2mm Hex wrench, and Vertical Locking Nut Wrench
- Weight: 2.4 oz.
Installation Instructions:
1) Place both Lateral Locking Slugs into each end of the Tailpiece, then slide both Mounting Studs through each end of the Tailpiece
2) Thread the two Vertical Locking Nuts onto the Mounting Studs. Leave the nuts approximately 1/4" from the bottom of the Tailpiece
3) Install the Tailpiece assembly by threading the two Mounting Studs into the body inserts on the guitar. To prevent binding, each Mounting Stud may have to be threaded on a little at a time.
4) Set your desired heigh of the Tailpiece, then using the provided Vertical Locking Nut Wrench, tighten the Vertical Locking Nuts all the way up to medium pressure
5) Tighten the two Lateral Locking Screws to medium pressure. Tighten the two Vertical Locking Nuts to full pressure, then finally tighten the two Lateral Locking Screws to full pressure
7) Install your strings and rock-on!
What drill bit size do I use to install the included body inserts?
Click HERE to learn.
Click HERE to learn.
